


Important Notice
CE PRODUIT DOIT ÊTRE INSTALLÉ SELON LE CODE D’INSTALLATION PERTINENT, PAR UNE PERSONNE QUI CONNAÎT BIEN LES PRODUIT ET SON FONCTIONNEMENT AINSI QUE LES RISQUES INHÉRENTS
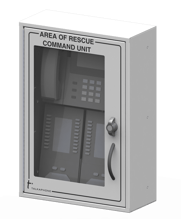
Area of Rescue Command Unit
Introduction
It is recommended that this instruction set be read completely prior to the start of any installation.
Product Contents
| QTY |
Part Number |
Description |
| 1 |
AOR-8 or AOR-16 |
8- or 16-Station Area of Rescue Command Unit |
| 2 |
12VDC, 4.5Ah Backup Battery |
|
| 1 |
Strobe/Siren |
Optional components (sold separately) include:
| QTY |
Part Number |
Description |
| 1 |
AOR-TR16 |
Trim Ring for Recess Mounting Model AOR-8 or Model AOR-16 |
| 10 |
6-32 Screw for Flush Mount Trim Ring Assembly |
Technical Requirements
General Requirements
- 115-230 VAC, 50-60Hz power source
- Maximum impedance between the Talkaphone Analog Call Stations and the AOR-8 or AOR-16 unit is 25 Ohms.
- Maximum cable length will vary depending on wire gauge (See Frequently Asked Questions, p.9).
Local Mode Only Requirements
- No external phone line (i.e. POTS/PSTN line) is required.
AOR-8 — Remote Mode or Day/Night Mode Requirements
- One (1) dedicated POTS/PSTN line (i.e. analog telephone lines (Plain Old Telephone Service / Public Switch Telephone Network) or analog telephone system (PBX) lines – PBX MUST allow for outbound calling).
- Basic programming for Day/Night Mode can be found here:https://support.talkaphone.com/portal/kb/articles/programming-the-aor-series-and-analog-stations-for-day-night-mode
AOR-16 — Remote Mode or Day/Night Mode Requirements
- Two (2) dedicated POTS/PSTN lines (i.e. analog telephone lines (Plain Old Telephone Service / Public Switch Telephone Network) or analog telephone system (PBX) lines – PBX MUST allow for outbound calling).
- Basic programming for Day/Night Mode can be found here:https://support.talkaphone.com/portal/kb/articles/programming-the-aor-series-and-analog-stations-for-day-night-mode
PBX Extention/Line Requirements
- At least 24 Volts at 20 mA off-hook (no current is drawn on-hook)
- Either a disconnect pulse (voltage drop at end of call) or 30-seconds or silence after hang-up (no re-order or howler feature)
Installation
- Remove the AOR-8 / AOR-16 unit from its packaging carton and inspect for any possible damage. If the unit is damaged or if any components are missing, please contact your Talkaphone distributor immediately. Do not discard any hardware or packaging prior to checking for all included components listed above, and the unit is installed and functioning correctly.
- Remove the three (3) Phillips screws from the right side of the unit which secure the hinged front cover shut.
- Remove the packaged front cover door handle from the telephone compartment and install to the outside surface of the unit using the provided screws.
- Carefully open the hinged front cover taking care there are no loose items which may have shifted during transportation.
- The AOR-8 / AOR-16 unit may be either surface mounted or flush mounted to a wall.
- For surface mounting the unit directly to the surface of an interior wall: The AOR-8 / AOR-16 unit has six (4) surface mounting keyholes.
- For flush mounting the unit: The AOR-8 / AOR-16 unit has eight (8) 7/32 [in] knockouts located on the top, bottom and sides which can be used for either mounting the unit within a wall or to fasten the available AOR-TR16 Flush Mount Trim Ring. This trim ring may be installed in contact with the closed cover without inhibiting the functionality of the hinge.
- Secure both halves of the AOR-TR16 to the wall using the provided 6-32 screws, two (2) washers, and hex nut.
- Installation of Strobe/Siren – Mount the strobe/siren assembly on a wall in an appropriate location per the instructions packaged with the strobe/siren assembly.
- Three (3) outgoing low voltage power lines from the strobe/siren assembly must be wired to the Black, Red/White, and Orange lead wires from the relays located in the upper section of the AOR-8 / AOR-16 unit’s internal compartment. The Black wire is a common negative and needs to be connected to both the strobe and siren negative terminals. The Red/White wire gets connected to the Positive terminal of the strobe and the Orange wire gets connected to the positive terminal of the siren.
- Installing Communication Lines – Bring in the Analog Call Station communication lines and any analog phone lines through conduit knockouts located on the rear, top, or bottom sides of the unit. Always try to separate power lines from communication lines as much as possible to reduce undesired effects on the phone line.
- Call Station Support
- The AOR-8 can support up to eight (8) Analog Call Stations. The Analog Call Stations on the system can connect to either the incoming POTS/PSTN line or the local phone built into the AOR-8 unit.
- The AOR-16 each support up to sixteen (16) Analog Call Stations divided into two (2) banks of eight (8). The Analog Call Stations on the system can connect to either the incoming POTS/PSTN line or the local phone built into the AOR-16 unit.
- Installing Line(s) for Analog Call Stations – Terminate the incoming Analog Call Station lines to Ports 1-8 in the appropriate bank on the printed circuit board assembly (PCBA) located between the power supply and local phone. The ports are labeled 1-8 for each respective bank.The FLAT side of the dial is what is pointing to each channel number. See photo below. (Photo represents an AOR-8. An AOR-16 has two of these stacked upon one another.) The tip and ring connections for the Analog Call Stations are polarity sensitive.
- The flat side of the dial points towards the number selected.
- Installing Line(s) for Off-Site Dialing – If a POTS/PSTN line or PBX extension line is to be used in addition to the phone built into the enclosure, connect the incoming phone line to the “TELCO IN” terminals for the respective bank(s), these connections are NOT polarity sensitive. See photo below.The “TELCO IN” terminals are located on the left side of theAOR-8 / AOR-16 unit’s enclosure—above the backup batteries.
- Local Mode – In Local Mode, pressing the button on any of the Talkaphone Analog Call Stations will cause the built in touch-tone telephone to ring.
- Remote Mode – In Remote Mode, pressing the button on any of the Talkaphone Analog Call Stations will cause them to access a phone line to dial out. For this configuration, connect an outside phone(s) line to the “TELCO IN” position(s) on the appropriate bank. (See image above for reference) – NOTE: See technical requirements above for outside phone line requirements.
- Day/Night Mode – Day/Night Mode is primarily used when a facility has a guard on-site during the day but not at night. It may also be used in any situation where the guard station is not always manned. When a Talkaphone Analog Call Station calls and the AOR-8 / AOR-16 unit is in Day/Night mode, it will ring the AOR-8 / AOR-16 unit’s built in local handset phone first, ring it a second time if no one answers the first time, then if no one answers the second time it will dial a remote number. If no one should answer the remote number, it will re-ring the local phone and continue this cycle until either the phone is answered or times out (see Emergency Phone Manual for information on setting the time-out.) When a guard leaves for the night, she can enter the code *36* to configure the consolidator to ring the remote phone first and then switch to the local phone (see Software Programming, page 6). For Day/Night Mode connect an outside phone line(s) to the “TELCO IN” position(s). This programming must be done for each of the consolidators (one (1) consolidator for the AOR-8 or two (2) consolidators for the AOR-16).
- Sharing a Phone LineWARNING: The other device sharing the line should NEVER be emergency equipment of any kind, including another bank of the AOR-16.Another telephone instrument (e.g., fax, modem, standard telephone, etc.) can share the outside phone line(s) with the
AOR-8 / AOR-16 unit by connecting the outside phone line(s) to the “Telco IN” position(s) and connecting the telephone instrument sharing the line to the “Telco OUT” position(s). Be sure to configure each consolidator in theAOR-8 / AOR-16 unit so that it does not answer before your other device picks up (or, if sharing with a standard telephone, be sure to allow enough rings for the person answering the phone to pick up).
- Once the correct configuration for the AOR-8 / AOR-16 unit has been determined and appropriately wired, connect incoming 115-230 VAC 50-60Hz power wiring to the power supply board located in the bottom left of the unit’s compartment. The LINE, NEUTRAL, and GROUND terminals are located on the bottom left side of the power supply as shown below.
- Connect the backup batteries. The batteries connect to the power supply board by inserting the connector onto the header pins located on the bottom right of the power supply board which the 115-230 VAC 50-60Hz power supply was connected. Although the pin is polarized, ensure correct polarity when connecting the backup batteries. Red-positive & Black-negative. (WARNING: Once the batteries are connected in the next step, power will be supplied to the unit. Verify all connections and take precautions from unintended electrical shock at this time. The order in which 115-230 VAC 50-60Hz or backup batteries is connected does not matter. However, once either the batteries are connected OR the 115-230 VAC 50-60Hz line is energized, THE UNIT WILL BECOME “HOT” ENERGIZED.)
Programming
|
1 Beep
|
Command completed successfully
|
|
2 Beeps
|
Error(s) detected
|
Remote Mode
In Remote Mode, if a standard telephone company phone line is being utilized via the TELCO “IN” connection, the consolidator does not need to be programmed. Move on to Programming the Talkaphone Analog Call Stations.
If a PBX line is being connected to the TELCO “IN” port, the consolidator must be programmed for PBX mode:
- Call the consolidator (listen for 3 beeps)
- Enter Guard Access Code: *31**
- Program the Consolidator for a PBX line: *39*2*
- Move on to Programming the Talkaphone Analog Call Stations
Local Mode
- Pick up the built-in handset and select the press the phone line corresponding to the bank of phones/consolidator to be programmed (listen for 3 beeps)
- Enter Guard Access Code: *31**
- Program the consolidator for Local Mode: *37*
- Move on to Programming the Talkaphone Analog Call Stations
Day/Night Mode
- Call the consolidator or pick up the built-in handset and select the press the phone line corresponding to the bank of phones/consolidator to be programmed (listen for 3 beeps)
- Enter Guard Access Code: *31**
- Program the consolidator for Day/Night Mode: *63*
- Program the consolidator to call either:
- If a PBX line is being connected to the Telco “IN” port enter the PBX code: *39*2*
- Move on to Programming the Talkaphone Analog Call Stations
AOR Programming Code Summary:
| Command |
Function |
| *31* …[up to 8 digits]* |
Guard Access Code entry for phone programming
(Default Code is *31**)
|
| *30* …[up to 8 digits]* |
Master Access Code entry to change Guard Access Code or Master Access Code (Default Code is *30*12345678*) |
| *30*14725836* |
Resets Consolidator programming to factory defaults |
| *32* …[up to 8 digits]* |
Programs and stores a new Master Access Code |
| *33* …[up to 8 digits]* |
Programs and stores a new Guard Access Code |
| *34* …[up to 2 digits]* |
Sets number of rings before consolidator picks up when it is dialed |
| *62* |
Remote Mode (default) |
| *37* |
Local Mode |
| *63* |
Day/Night Mode |
| *35* |
In Day/Night Mode, call LOCAL PHONE then TELCO IN |
| *36* |
In Day/Night Mode, call TELCO IN then LOCAL PHONE |
| *39*…[1 or 2]* |
Program the type of phone line in the TELCO IN
*39*1* for ordinary phone lines (default) *39*2* for PBX lines |
|
*4X*
|
Routes to Analog Call Stations in Port #1-8
|
Programming the Analog Call Stations (BASIC SETUP)
*4X* Routes to Analog Call Station in port number X (X=1-8)
For details on programming the Talkaphone Analog Call Stations, refer to the Installation & Operation Manual for Emergency/Information Phones.
Operating Instructions
When a push button on the Talkaphone Analog Call Station is pressed it will automatically either ring the local phone or dial out using the phone line connected to the TELCO “IN” port according to how the particular consolidator which it is connected is programmed. If the phone line is being shared with another device (see sharing a line), the consolidator will seize the line on behalf of the Analog Call Station.
When a call comes in to the AOR-8 / AOR-16 unit , an LED will light indicating which Analog Call Station is calling in. If a call is already being answered, any other calls which come in will cause the appropriate LED to blink to indicate they are awaiting an open line. As soon as the initial call has been completed, any calls that were waiting will be put through in the order in which they were placed.
- Calling Talkaphone Analog Call Stations through the Area of Rescue Command Unit
To call from a remote phone, dial the telephone number of the Consolidator. To call from the local phone, simply pick up the phone and select the phone line corresponding to the appropriate consolidator. In either case, you will hear 3 beeps when the consolidator is ready.
Enter the code to route to an Emergency Phone, *4X* where X= Port #1-8. There will be a short pause and then the Analog Call Station will answer with a series of tones.
For more information on Analog Call Stations, consult the Emergency/Information Phone manual.
- Answering the Analog Call Stations
When a call comes in on either the local phone or a remote phone, the consolidators are effectively transparent. That is, there will exist an open line of communication to the Analog Call Station from the moment the call is answered.
General Troubleshooting
| Problem |
Possible Causes |
| My unit does not function at all. I cannot call it or call out with it. |
1. The power supply is not properly connected (check the power LED). 2. The phone wires are not properly connected. 3. Your unit has been struck by lightning or another very high voltage source. Contact Talkaphone’s Service Department. 4. There isn’t enough power on the line (see Technical Requirements, page 3). 5. You may have accidentally plugged a PBX line or phone company line into the Local port. If so, contact Talkaphone technical support. |
| I hear noise on the line. |
1. You are not using twisted, shielded wire. Fluorescent lights, elevator machinery and many other devices can produce noise on your wires if they are not properly twisted and shielded. (See FAQ #9.2 for wiring requirements.) |
| The Local Phone rings briefly but then when I pick up I hear three beeps. |
1. The Analog Call Station that called in was not programmed with a phone number (see FAQ #9.3) |
| When I call an Emergency Phone through the AOR-8 / AOR-16 unit, I cannot communicate with the person at the other end. |
1. The Analog Call Station was not programmed to automatically go “live” after being called. It is in programming mode. You can activate it for a single call or for all future calls by entering your guard code (*4**) followed by either *5* for a single call or *78* for all future calls. (See Emergency Phone Manuals for more information.) |
| The consolidator will not accept my Access Code |
1. You are using a touch-tone phone on a PBX that is not giving the consolidator the appropriate tones. 2. Someone has changed the Access Code. You can reset all codes to factory default by entering *30*14725836* (see FAQ #9.4). |
| The Bank(s) trouble lights are all flashing together. |
There is a ground fault in the system somewhere. Check ground wiring and reset the system. If the alarms/lights continue to flash, power off the system completely and check wiring. Otherwise, contact tech support by calling 773-539-1100 and select Technical Support. |
Frequently Asked Questions (FAQs)
| Distance from AOR-8 / AOR-16 Unit to Analog Call Stations |
Recommended Wire Gauge |
| 0 – 500 feet |
24 AWG |
| 501 – 750 feet |
22 AWG |
| 751 – 1,000 feet |
20 AWG |
| 1,001 – 1,800 feet |
18 AWG |
| 1,801 – 3,000 feet |
16 AWG |
| 3001 – 5,000 feet |
14 AWG |
| Distance from AOR-8 / AOR-16 Unit to Local Phone |
Recommended Wire Gauges |
| 0 – 1000 feet |
24 AWG |
| 1001 – 1500 feet |
22 AWG |
| 1501 – 2000 feet |
20 AWG |
| 2001 – 3,600 feet |
18 AWG |
| 3,601 – 5,000 feet |
16 AWG |
| 5,001 – 8000 feet |
14 AWG |
All prices and specifications are subject to change without notice. Talkaphone, Talkaphone, Scream Alert, WEBS, and WEBS Contact are registered trademarks of Talkaphone, LLC All rights reserved. All other trademarks mentioned in this document or website are the property of their respective owners and does not imply or indicate any approval, endorsement, sponsorship, or affiliation with such owners unless such approval, endorsement, sponsorship, or affiliation is expressly indicated.